Hello there, Hay is here.
It’s been quite a while since I wrote my last post, so let’s begin!
Today, I’m excited to introduce you a new cool feature by Postman platform that I’ve recently discovered which has the potential to save you time and enhance your efforts on demonstrating API vulnerabilities.

When we discuss on providing API PoC vulnerabilities for Bug Hunting programs or customer reports, the classic method involves providing a short Python script to demonstrate the full impact (Dana Epp’s done a good job on this1 - Thank you man!).
In the following article, I’ll introduce a new alternative approach that can also be effective in certain cases which focusing on the GUI approach, and doesn’t even require any programming skills !
Note: For demostartion purposes, all the presented examples will be showed on the OWASP crAPI2 project that serves as a vulnerable API’s platform for new beginners who want to start their hacking learning process.
What is Postman Platform?
Postman is an API tool development platform that simplify the process of building, testing, and managing API’s under a group of HTTP requests that called Collections.
This tool offers a wide range of built-in capabilities for interacting with API requests, for example:
- Load
OpenAPIspecifications as API documentation - Execute a sequence of HTTP requests using the
Collection Runnerfeature - Interact with
GraphQLAPI instances - Visualizing outcomes using the
Postman Visualizertool
And finally the crown jewels: the Postman Workflows feature.
So,
What Postman Workflows is all about?
Postman Workflows is based on a sequence of HTTP requests that need to occur in a certain flow to achieve its goal. For example, combining a series of dependent requests (passing some parameters between them) to achieve a BOLA (Broken Object-Level Authorization) vulnerability, iterating over a list of API requests that implement a pagination feature to pull out all of it data, you got the idea ![]()
BOLA Demonstration using Workflow
For our workflow creation, let’s demonstrate it using the first crAPI challenge: accessing details of another user’s vehicle location as a BOLA vulnerability.
After signing up on the crAPI platform and adding my own vehicle under my profile, there is a blue button called Refresh Location. Clicking this button will trigger a background API GET request including my vehicle’s unique UUID as a parameter, providing us with the vehicle’s real-time location:
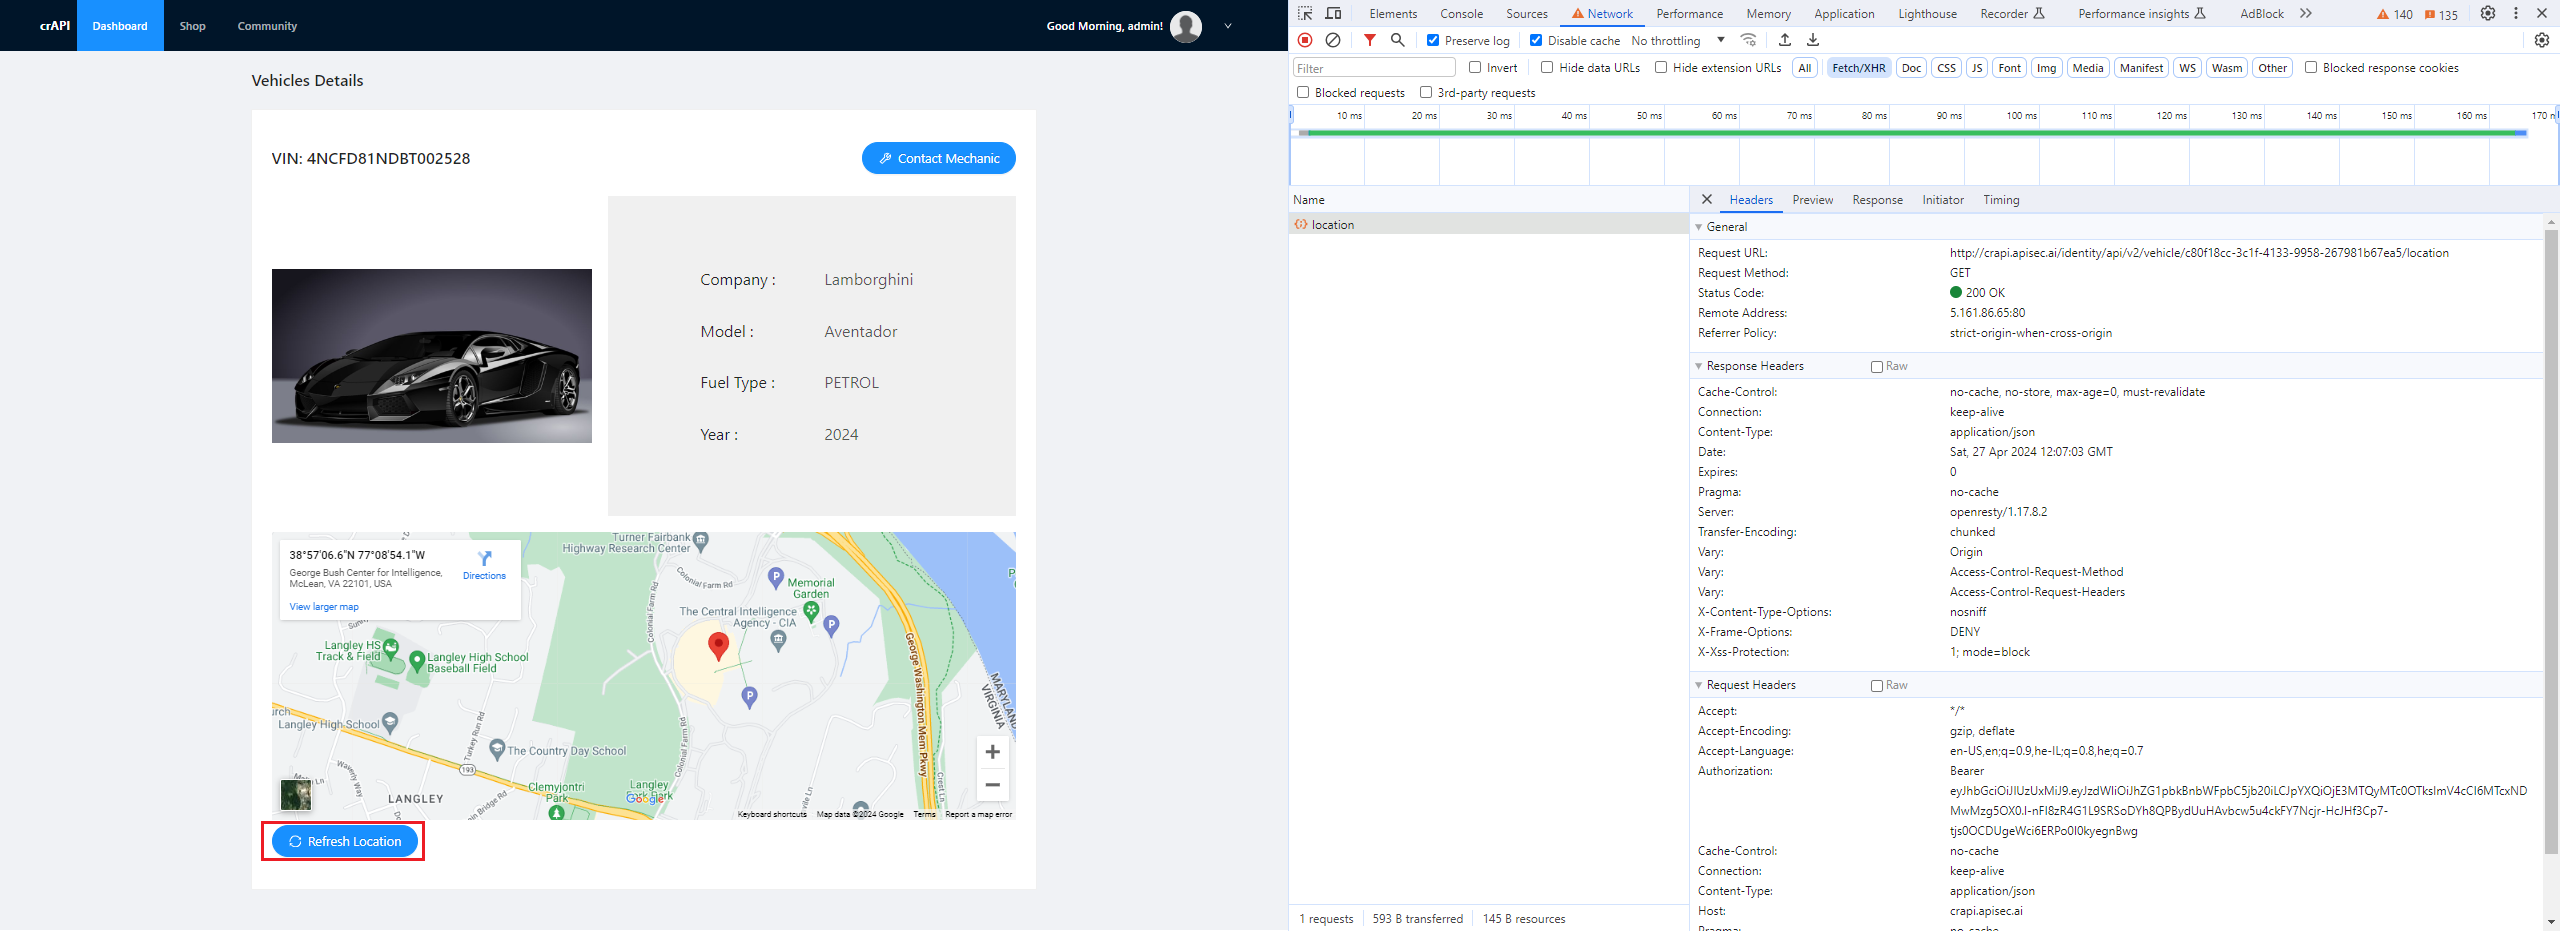
Getting my vehicle location by passing vehicle's UUID paramter
The response of the request will provide us with the vehicle location using the carId as a UUID parameter. If we can change the carId to a different UUID belonging to another user and receive their vehicle location, we have found a BOLA vulnerability. All we need to do is find a way to obtain the UUIDs of other victims and exploit them in this request:

Returned latitude and longitude vehicle data
By using the community page of the crAPI platform, we can obtain all victims data, including their vehicleId, which represents their car’s UUID parameter to be provided in the above request. With this information, we can iterate over each vehicleId and send a request to the /identity/api/v2/vehicle/UUID_PARAMETER/location endpoint to receive their vehicle’s location and achieve our malicious goal:
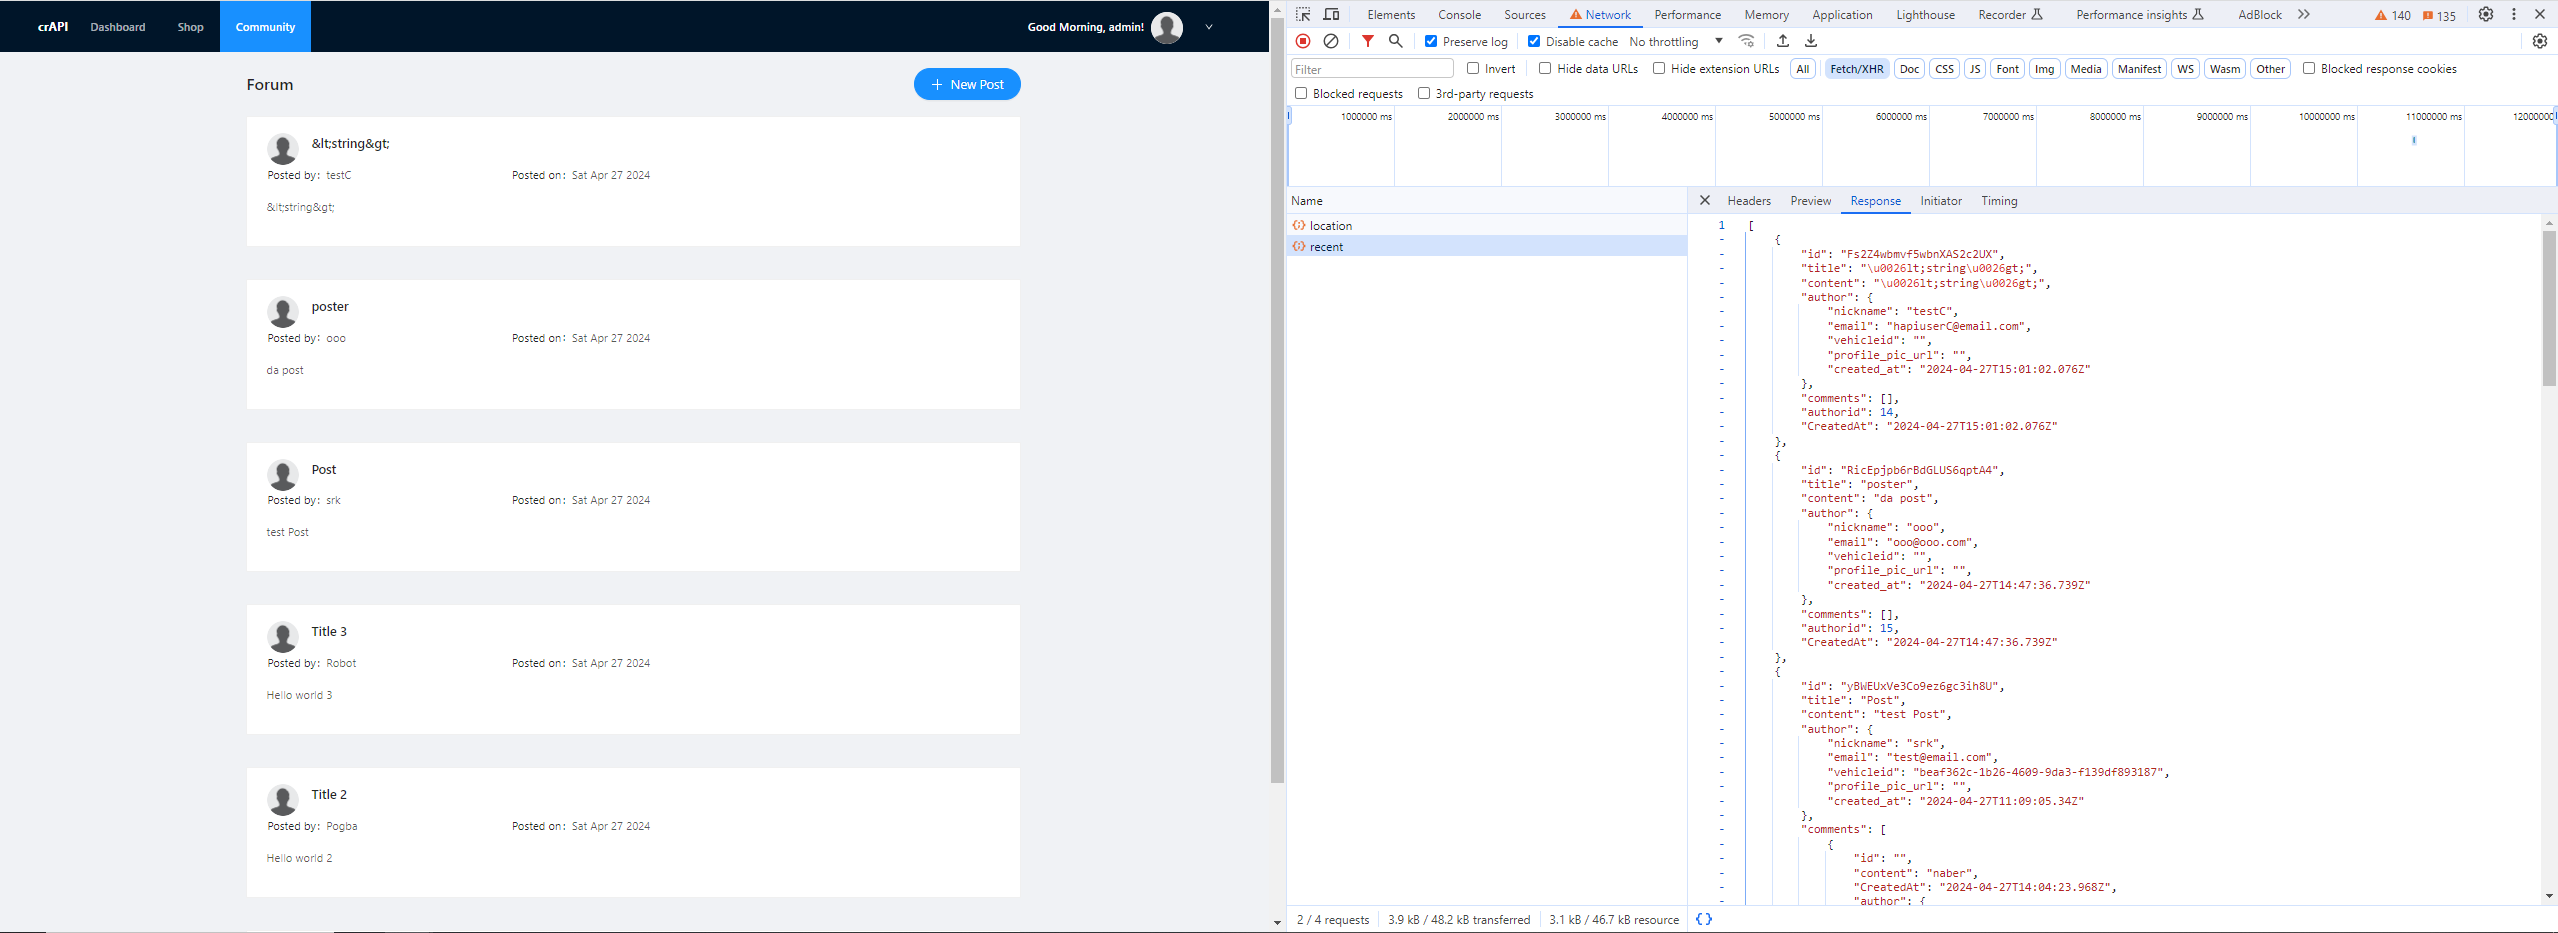
Community page exposed all victims personal information
So, let’s summarize this into one flow:
- Retrieve all victims personal information from the
/community/api/v2/community/posts/recentendpoint. - Iterate through each result in the list and extract the vehicleId associated with each victim.
- For each vehicleId, use it as a UUID parameter and send an HTTP GET request to the
/identity/api/v2/vehicle/UUID_PARAMETER/locationendpoint. - Print out the results.
Workflows come into play to help us automate this entire process. The final workflow will look like this:
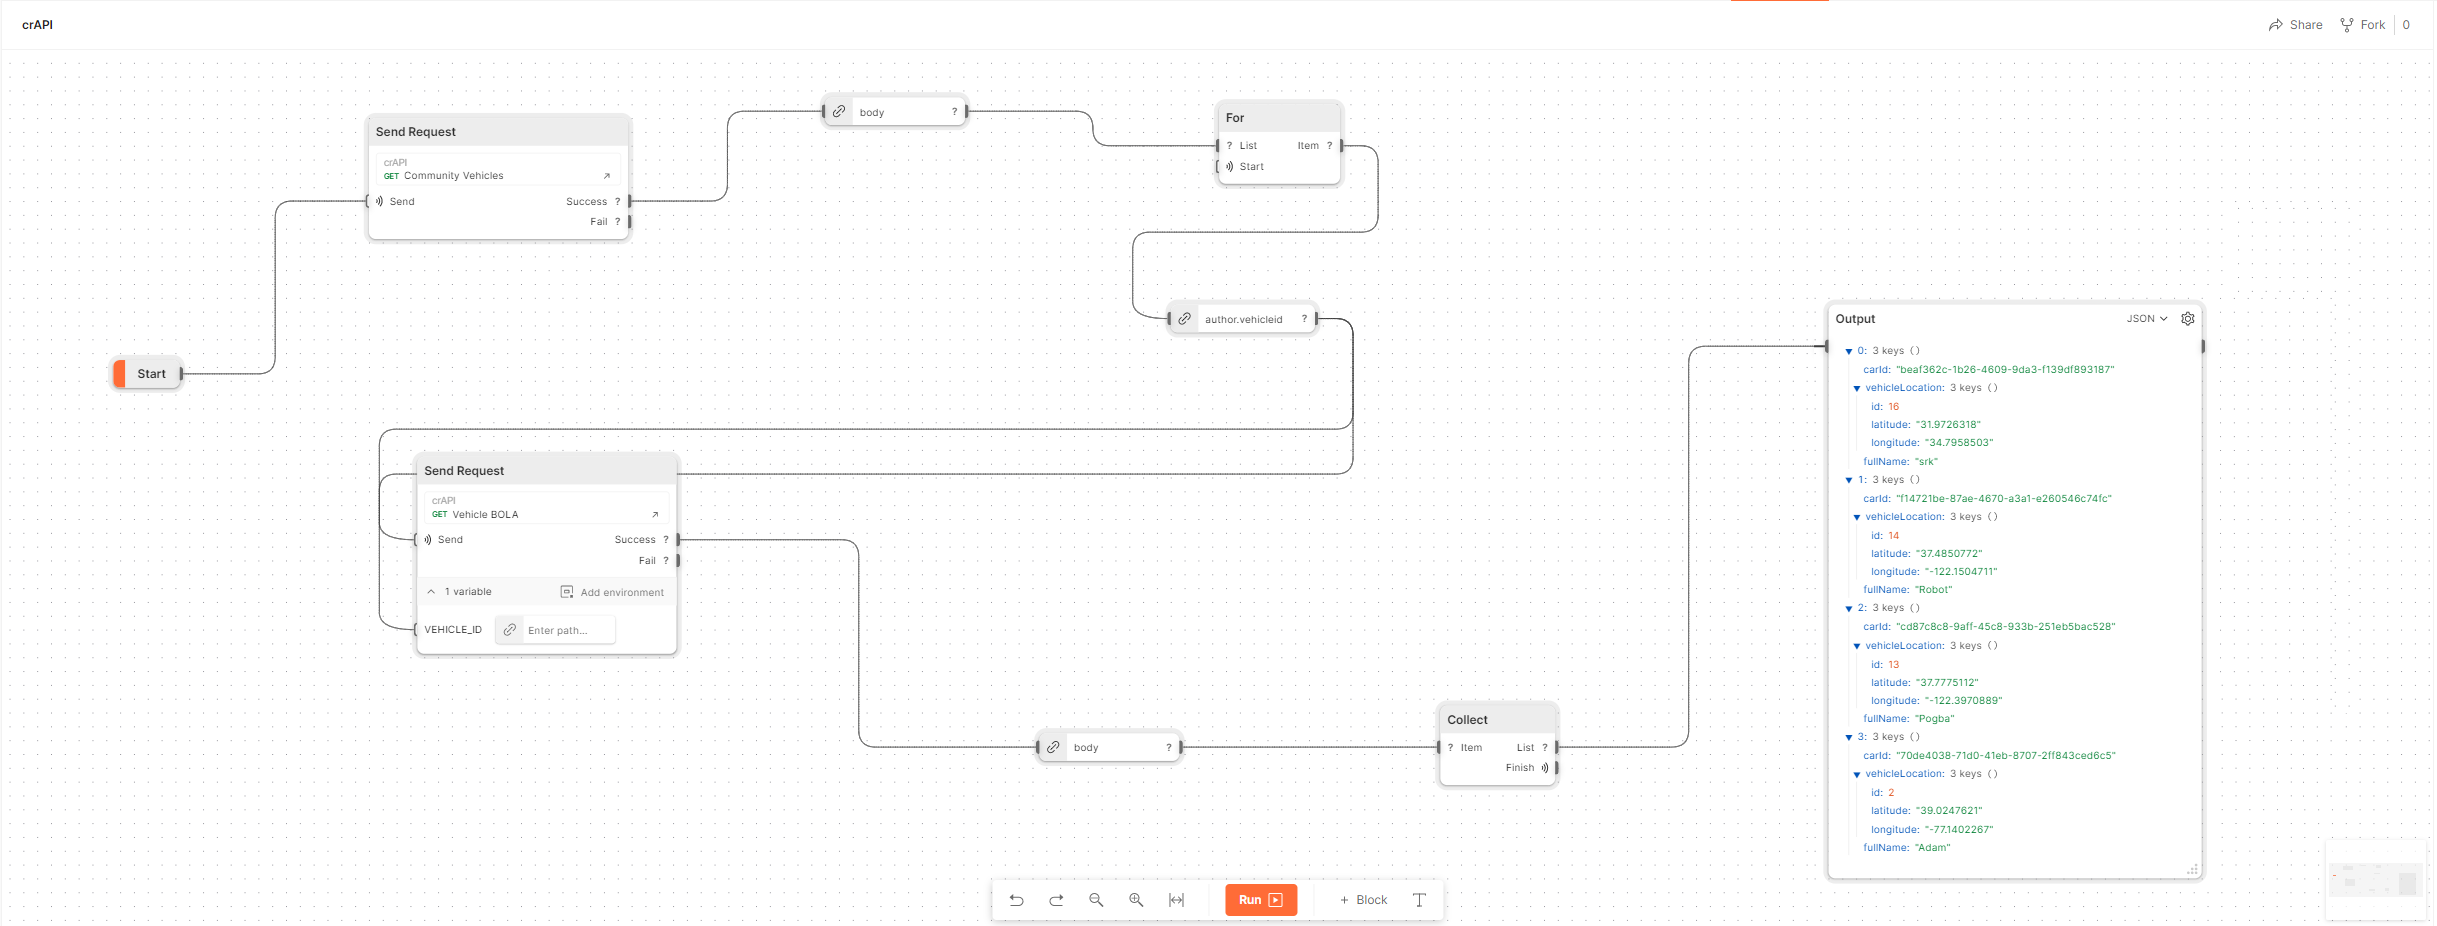
BOLA Flow (Click here for higher picture resolution)
Now, let’s break down each part of the graph:
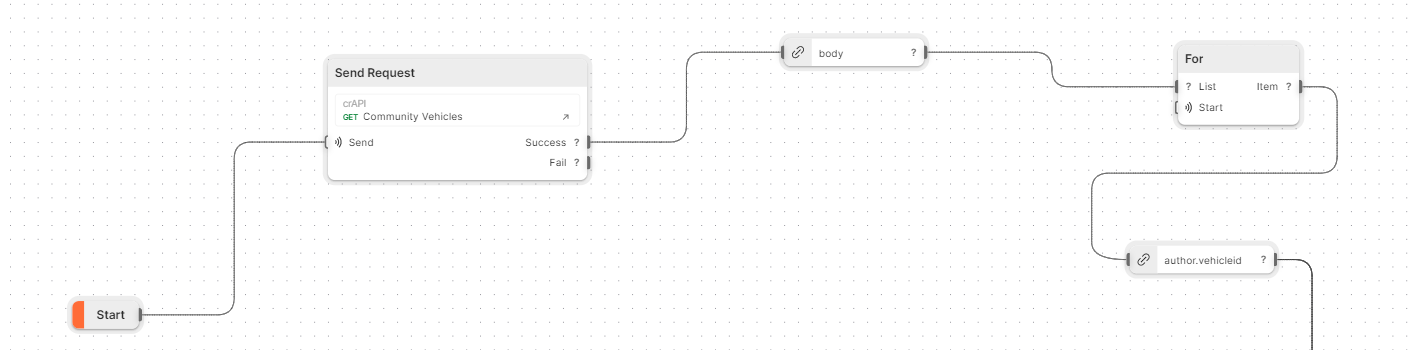
First part of the Workflow
- The workflow starts running from the
Startorange label, serving as the entry point of the flow. - Immediately after that, the first HTTP request is executed to the
/community/api/v2/community/posts/recentendpoint. (This endpoint was previously saved as an HTTP request in my PostmanCollectionsection) - This block is then divided into two separate parts:
- Handling the request when it’s considered a
Success(i.e., when a 200 HTTP Status Code is returned). - Handling the request when it’s considered a
Fail(i.e., when a 400/500 HTTP Status Code is returned).
- Handling the request when it’s considered a
- In this case, we only want to handle the
Successpart. Therefore, at this step, we extract theHTTP Bodyof the response, which contains the victims’ data. - Next, we iterate over each victim’s data returned. To accomplish this, we use the
Forblock loop, which functions similarly to theforloop inPython. - From each of the returned victim JSON lists, our focus is on extracting the
vehicleId, which will be sent to the/identity/api/v2/vehicle/UUID_PARAMETER/locationendpoint.
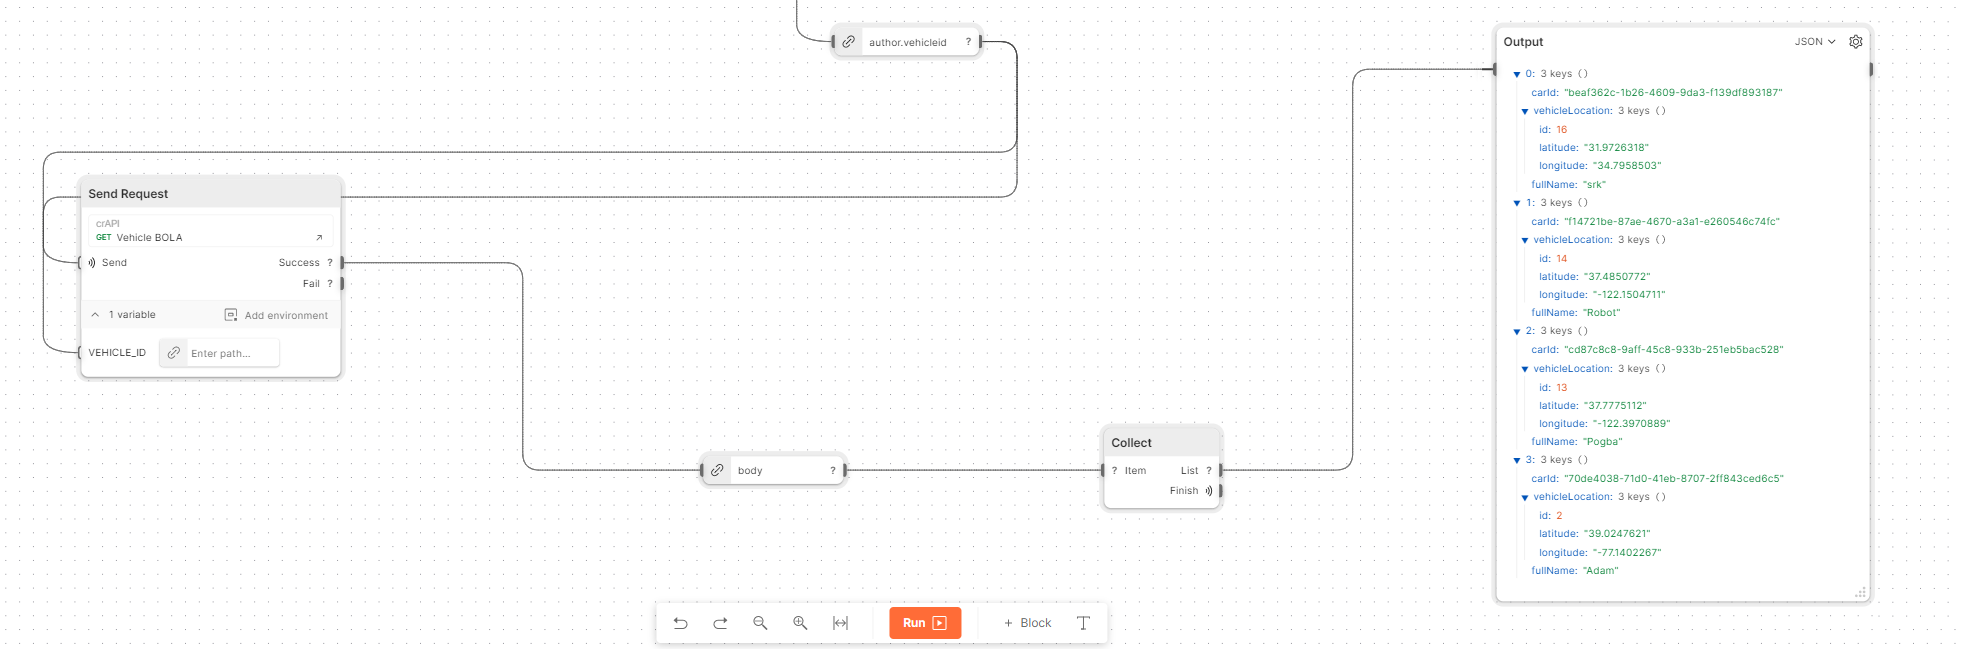
Second part of the Workflow
- The flow continues by passing the vehicleId from the previous response as a Postman pre-defined
VEHICLE_IDvariable and adding additionalSend Requestblock to trigger the BOLA API request with this parameter. - Once again, we extract the data directly from the
HTTP Bodysection of the returned response. - To merge all of the returned victims’ data from the BOLA request into one comprehensive output, we utilize the
Collectblock. - Finally, we display the victims’ real-time vehicle locations using the
Outputblock.
Summarizing Up
In the end, Postman Workflows can enhance your automation and presentation skills by allowing you to easily build drag-and-drop flows with just a click of a button.
For more coverage on this topic, I’m providing you a link to a Youtube Playlist3 of a short series presenting additional workflow features. You can learn from and use these for your demonstrations, both for fun and profit.
Thanks for reading!
Disclaimer: This material is for informational purposes only, and should not be construed as legal advice or opinion. For actual legal advice, you should consult with professional legal services.
💡 Prefer not to sign in here? You can comment directly on the related GitHub discussion.